Monday, February 28, 2011

A Fat Quarter Skirt...how to make one!


I dreamed this up today.  I am sure I am not the first, there is nothing new under the sun after all, but it was new to me.  A skirt from fat quarters was my idea.  I dug around in my sewing stuff to see what I had that would coordinate.  If I would have gone to the fabric store I would have picked out something much more lively, but this worked in a pinch so I could get my idea rolling.


Here are my two fat quarters.


I cut each quater in half and then cut each half in half, which gave me eight strips of fabric that were 18 inches by 4-1/2 inches.  (I would say this skirt is a 2T and you would probably want to add another fat quarter for each size you go up, 3 for a 3T, 4 for a 4T.) With right sides together, pin and sew down the long side with a 5/8 inch seam.


Continue adding strips until you have used them all.


Once you have sewn all the strips together, pin the ends, with right sides together and sew at 5/8 inch.


Press all your seems flat, or if you are really cool you will have used a serger to sew all these strips together!


Make a casing for your elastic.  Fold over 1/2 inch and press, then fold over 1 inch and press and pin.  Sew along edge, leaving an opening big enough for your elastic to fit through.  (Be sure to back stitch at the beginning and end of the opening.) I was using 1/2 inch elastic.  I use my elastic as a guide for how big to make my casing.  Thread elastic through the casing and check for fit.  Sew ends together using a zig-zag stitch, going over it several times for strength.


In the same way you made the casing, make the hem.  I like a wide hem.  It is less likely to curl up in the washer.  Fold and press fabic 1/2 inch and then fold over again and press at 1 inch.  Stitch close to the top of the fold.  Your done! 


I have never written directions on sewing anything.  I hope these are clear enough.  This is really simple, but you can always leave me a comment with a question and I will comment back with an answer.

Friday, February 25, 2011

Roasted Garlic


Roasted garlic is yummy and easy.  You don't have to have a fancy garlic roaster either.  You can just use foil.  Once roasted you can spread on crusty bread, throw in mashed potatoes or just eat along side a slab of steak!


Preheat oven to 400 degrees.  After removing most of the paper from the outside of the heads of garlic, chop the top off being sure to expose the tops of all cloves.  You may have to do some tricky cutting if you have some cloves down low on the sides.  Drizzle with olive oil and sprinkle with sea salt.  If you are using foil, place cloves on foil in a pie tin, prepare as directed and then seal the foil.


Roast garlic in a 400 degree oven for 40 to 50 minutes until they look nice and caramlized on the top.  To remove from skins I use the tines of a fork. 

Thursday, February 24, 2011

Strawberry Banana Smoothies

I have often wondered why people would be interested in such simple recipes.  I have now decided that sometimes we just get in a rut and need some inspriation, no matter how simple.  Once while reading the kids a book, we read of a family that rolled out store bought biscuits and then made mini-pizzas.  Totally simple...but I would never have thought to make a biscuit pizza.  I don't know if it is a home school phenomena or what...but my kids expect more than a sandwich, more than just an apple.  Maybe they are just spoiled.  Today we made smoothies for a mid-morning snack.  The boy is hungry all the time.  He would probably starve to death if I sent him to school  :O)


Throw 1 cup crushed ice and 8 ounces frozen strawberries into your blender.


Add 1 cup strawberry yogurt.


One "rotten" banana.


Pour in 1/2 a cup of milk and begin to mix, adding more milk to make the desired consistency.


Strawberry Banana Smoothies
  • 1 cup crushed ice
  • 8 ozs. frozen strawberries
  • 1 cup strawberry yogurt
  • 1 "rotten" banana (really ripe and sweet)
  • 1/2 cup milk plus more to make smoothie desired consistency
Throw all ingredients into blender and blend until smooth. Serve to happy children.

Wednesday, February 23, 2011

Enter to Win a Berkey Light Water Filter

Stephanie at Keeper of the Home is giving away a Berkey Light Water Filter.  You have until February 25th to enter.  Apparently California is totally against its people drinking clean water, so if you live in California and you win you will need an out of state address to have the water filter shipped to. 

Monday, February 21, 2011

Mini Pecan Pies ala Mode

I have posted about these before.  They are billed as Pecan Pie Muffins, but to me they are much more of a dessert.  In fact, on my Pecan Pie Muffin post I metioned at the bottom that these would be amazing as dessert.  I was right.  These are better as dessert than breakfast.  We mixed these up after dinner clean up and ate them hot with vanilla ice cream.  Every bowl was licked clean!


Pecan Pie Muffins
  • 1 cup Packed Light Brown Sugar
  • ½ cups All-purpose Flour
  • 1 cup Chopped Pecans
  • ⅔ cups Softened Butter
  • 2 whole eggs, beaten
  • Vanilla Ice Cream
Preheat oven 350 F. Grease your muffin pan well. In a medium bowl, stir together brown sugar, flour and pecans. In a separate bowl, beat the butter and eggs together until smooth. Stir into the dry ingredients just until combined. Spoon the batter into the prepared muffin cups. Cups should be about 2/3 full. Bake for 20 to 25 minutes. This made 10 muffins for me, but this will vary depending on the size of your muffin pan and how much batter you put in each cup.  These are sticky little guys.  You will need to go around the edges with a knife and then let cool a couple of minutes before removing.  For best results, flip the pan upside down to remove to avoid tearing the muffin into pieces.  Top with vanilla ice cream.

Wednesday, February 16, 2011

Nana's Apple Crumb Pie

My favorite pie is apple, but only if it is my Nana's apple pie recipe.  Cooked at a high temperature, for almost an hour leaves you with very soft, almost mushy apples.  I do not like crunchy apples in my pie.  If I want a crunchy apple, I will grab one out of the fridge and eat it.


APPLE CRUMB PIE
1 pie crust
6 Granny Smith apples, peeled and sliced thin
1/2 cup sugar
1 t. cinnamon

Topping:
1/2 cup sugar
3/4 cup flour
1/2 cup butter, chilled

Preheat oven to 400 degrees.  Prepare pie crust in your favorite manner. 


Peel and thinly slice apples.  Toss apples with 1/2 cup sugar and 1 teaspoon cinnamon (or more). 


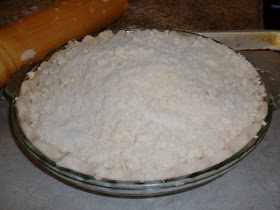
Evenly layer the apples into the crust.  Combine 1/2 cup sugar and 3/4 cup flour.  Cut butter into eight slices and put in with flour.  Cut in butter with pastry cutter until you have pea size and smaller crumbs.  Sprinkle evenly over apples, being sure to cover the entire surface. 


Place pie on a cookie sheet to catch anything that might bubble over.  Bake for 30 minutes.  After 30 minutes check pie to be sure it is not getting to brown.  If it is getting to brown, lightly tent with foil.  Spin pie around 180 degrees and cook for another 20 minutes, making sure it doesn't brown to much if not covered with foil. 


Cool on rack for a couple of hours before serving.


Check out more fun stuff at Works For Me Wednesday.

Tuesday, February 15, 2011

Chicken Pot Pie


This is the best Chicken Pot Pie ever!  The crust is what really makes this pie.  It isn't really a crust, but crumbles of flour, butter, heavy cream, fresh Parmesan cheese, baking powder and salt.  How can that be wrong?  I think we could have just eaten the pan of crumbles and been happy.

THE WORLD'S BEST CHICKEN POT PIE
This is America's Test Kitchen's Pot Pie, modified to omit MUSHROOMS!
  • 1-1/2 lbs. boneless skinless chicken breasts (you can use a mix of thighs and breasts if you like that sort of thing)
  • 3 cups chicken broth
  • 1 T. olive oil
  • 1 cup carrots, diced
  • 4 ribs celery, diced
  • 1 small onion, diced
  • 3/4 frozen peas
  • 3 potatoes, cooked and diced
  • 4 T. butter
  • 1/2 cup flour
  • 3 cups broth (that the chicken was poached in)
  • 1 cup milk
  • 2 t. lemon juice
  • Salt and pepper to taste
Crust:
  • 2 cups flour
  • 2 t. baking powder
  • 3/4 t. salt
  • 1/4 t. pepper
  • 6 T. chilled butter
  • 1/2 cup fresh Parmesan cheese, finely grated
  • 3/4 cup plus 2 T. heavy cream
Place chicken breasts and broth in a large pot.  Bring to a simmer and cover for about 15 minutes, until chicken breasts are cooked through.  Remove chicken from broth.  Strain broth through a fine strainer.  Set broth aside.  Shred chicken.  While chicken is cooking, peel and dice 3 potatoes.  Steam in microwave for 5 minutes, or until soft.  (I just put diced potatoes in microwave safe bowl with a 2 tablespoons water and cover plastic wrap.)  In same pot that you cooked the chicken, add oil, carrots, onions and celery.  Saute for about a minute on medium heat and then cover the pot to steam the veggies for 7 to 10 minutes, until wilted and soft, occasionally stirring to be sure they are just wilting, not burning.  Add veggies to a bowl with shredded chicken.  Preheat oven to 450 degrees. 

Time to make crumbles.  Combine dry ingredients.  Cut in butter until the texture is that of coarse cornmeal.  Mix in cream and Parmesan.  Stir until all floury bits are wet. 


Pour dough out onto a cookie sheet lined with parchment paper and crumble/tear the dough into small pieces, about 1/2 inches in size.  There will be some very fine bits and some larger pieces.  Bake in oven for 10 to 13 minutes, until very lightly browned. 


While this is baking you will make your sauce.  In the same pot that you cooked the chicken and veggies, melt butter.  Once butter is melted whisk in flour, whisking for about 1 minute.  Slowly add the chicken broth, whisking vigorously to avoid lumps.  Add milk.  Bring to a simmer, until you see bubbles form around the edges of the pot and reduce heat, stirring until thickened, about 3 to 5 minutes.  Turn off heat and add chicken, veggies, potatoes and frozen peas.  Stir to combine. 


Pour into a 13x9 inch casserole dish.  By this time you should have removed your crumbles from the oven.  Carefully re-crumble the crumbles (careful they will be hot!) and cover the top of the filling.  This will seem like a lot of topping (until you eat it...you will wish there was more.)  Place pie into the 450 degree oven for 12 to 15 minutes, until filling is bubbling (which was already hot to begin with) and crumbles are golden brown.


Find more yummy recipes at Tasty Tuesday.

Monday, February 14, 2011

The Farmer and His Sons...in their own words.

The Great Treasure

by

Carley

There once was a farmer who had a great illness and was afraid for there was no one to care and tend his farm and family.  He did have three sons but they were lazy and too careless to tend and care for his land, he thought. He called his three sons to his bedside and told them, "There is a great treasure hidden in my fields." After their fathers death, they took their spades and shovels and thoroughly dug carefully the whole field. They stomped off frustrated, for they had found no treasure. That year they had an extraordinarily abundant crop.  They finally realized it was the fruit of their own labor. They lived happily ever after.


Laziness Produces Nothing

by

Hannah

There once was a farmer that was stricken by a deathly illness and he was afraid that his farm would not prosper.   The farmer had two lazy sons who sat around and ate sweets all day long so he was afraid that they would be careless tending to the crops. Before he died he beckoned for his two sons to come to his bedside. When they were by his bedside he told them that there were treasures hidden in his fields. So, the sons took pickaxes and mattocks and set to work digging everything in sight. Frustrated, they stomped back madly since they had not found any treasure. When they plowed and planted that year their crops were extraordinarily abundant and the family lived comfortably that winter.  Finally the sons realized the treasure was the fruit of their labor. The sons learned that laziness produces nothing.

Creamy Lemon Squares

This is another delicious recipe from the Pioneer Woman.  I have made these many times.  They are simple to make and use ingredients you have laying around the house.  Once again, I am not a photographer.  It is especially hard to take pictures when you have a 2 year old assisting you in your baking.  For some extremely lovely pictures of the Creamy Lemon Squares please click on the link above!

CREAMY LEMON SQUARES
  • 1-1/3 cups All-purpose Flour
  • ½ t. salt
  • 1 t. baking powder
  • 1 stick (1/2 Cup) Butter, Slightly Softened
  • 1 cup Brown Sugar (lightly Packed)
  • 1 cup Oats
  • 1 can (14 Ounce) Sweetened Condensed Milk
  • ½ cup Lemon Juice
  • Zest Of 1 Lemon
Preheat oven to 350 degrees.  Using your stand mixer with the paddle attachment mix butter and brown sugar until well combined.  Sift together flour, salt, and baking powder. Add oats and flour to butter/sugar mixture and mix to combine. Press half of crumb mixture into the bottom of an 8 x 11 inch pan. 


Place remaining crumb mixture aside in another bowl.  Wipe out your mixer bowl with a paper towel.  Using the whisk attachment mix together condensed milk, lemon juice, and lemon zest. Spread onto the bottom layer of the crumb mixture.


Top with the other half of the crumb mixture, but don’t press.  I use a spoon and sprinkle the remaining crumbs over the top and then gently smooth with the spoon.  Bake for 20 to 25 minutes, or until golden brown. Allow pan to sit on counter for 30 minutes after baking. Cut into squares and refrigerate for a couple of hours or until cool.  Serve cool.


Hey What's For Dinner

Friday, February 11, 2011

Soaked Whole Wheat Bread...I can sorta cook....but I am definitely not a photographer!


This looks really gross!  This is the result of the overnight bowls.  Chop up the dough to ensure that it gets mixed together evenly.


Here in the mixing bowl are the chunks of dough along with the remainder of the ingredients.  Knead for 5 minutes adding more flour as needed.


Getting ready to rise.  You can see that the dough is somewhat sticky by the sides of the mixing bowl.  I have found that I like my dough a little more sticky and wet even if it is a little harder to work with.


This is the finished loaf.  This is only the second time that I have made soaked wheat bread.  As you may have read earlier, I have a large supply of hard red wheat.  If you have ever used hard red you know that it can have kind of a harsh taste, especially if you are not used to it.  Soaking the flour really changes the taste, for the better.  It also makes the flour easier to digest.  Read about the health benefits of soaking your grains here.


SOAKED WHOLE WHEAT BREAD

Bowl #1
  • 1-3/4 cups whole wheat flour
  • 1/2 t. salt
  • 3/4 cup milk
  • 2 T. whey if you have it or 2 T. plain yogurt
Bowl #2
  • 1-3/4 cups whole wheat flour
  • 1/4 t. instant yeast
  • 3/4 cup filtered water
Additional ingredients for day 2:
  • 1/2 t. salt
  • 3 t. instant yeast
  • 2-1/4 T. honey
  • 1 T. melted butter
The night before baking the bread combine the ingredients for bowl #1 and cover with plastic wrap.  Leave out on counter overnight.  Combine the ingredients for bowl #2, cover with plastic wrap and place in fridge overnight.

The next morning, remove bowl #2 from the fridge and let set at room temperature for 2 hours.

Chop both pre-doughs into 10 to 12 smaller pieces.  Put pieces in bowl of stand mixer.  Combine with 1/2 teaspoon salt, 3 teaspoons yeast, honey and melted butter.  Start kneading with dough hook.  If dough seems too sticky add more flour one spoonful at a time until dough pulls away from sides, but is slightly sticky.  Knead for 5 minutes.  Shape into a ball and place in oiled bowl.  Let rise for 1 hour, or until doubled.  Shape into loaf and place in prepared loaf pan.  Let rise again for 30 to 45 minutes, until doubled, but not more than doubled.   Preheat oven to 425 degrees and insert a cookie sheet or small cake pan on the top rack. When the dough is ready to bake, put it in the oven and pour one cup hot water into the upper pan. Lower the oven temperature to 350 degrees and bake for 20 minutes, rotate loaf 180 degrees and bake for about 20 to 30 minutes, until golden.  Remove from pan and place on cooling rack.  Let cool at least 1 hour before slicing.

Monday, February 7, 2011

Quick Bread Cinnamon Rolls


Quick bread cinnamon rolls are quick!  You can easily get them started and have them coming out of the oven in about 1 hour and 15 minutes.  They are tasty too.


QUICK BREAD CINNAMON ROLLS
  • 2 cups whole wheat flour
  • 2 cups all-purpose flour
  • 2 T. yeast (this is what makes it so quick)
  • 1 cup milk
  • 1/2 cup water
  • 1 t. salt
  • 1/2 cup oil
  • 3 T. honey
  • 1 cube butter softened
  • brown sugar
  • cinnamon
  • a little melted butter
  • maple syrup


Combine 1 cup wheat flour, 1 cup white flour and the yeast in your standing mixer bowl.  In a saucepan warm milk, water, oil, honey and salt.  Not too hot or it will kill the yeast, just warm to touch, melting the honey.  Pour the warm mixture in with the flour and yeast, stir with a wooden spoon.  Using your dough hook, slowly add the rest of the flour.  Knead for 5 minutes.  Remove from mixing bowl. Quickly knead a couple of times with a little flour to make the dough smooth.  Form into a ball and let rest for 10 minutes.  Roll out into a rectangle.  This will be pretty large, about 18x12 inches.  Spread softened butter over entire surface.  Sprinkle with brown sugar to taste...the more the better. Sprinkle with cinnamon the same way.  We like a lot of cinnamon.  Roll into a log, starting on the longer side.  Pinch seam together.  At this point I usually stretch the log of cinnamon roll dough out a little to make it a little more even in diameter...it is usually thicker in the middle.  Slice into 1 inch thick slices and place in a large pan sprayed with no stick spray.  Let rise 30 minutes.  Preheat oven to 400 degrees and bake 15 to 20 minutes, until nice and golden.  Once you remove them from the oven, brush with melted butter and then brush with maple syrup. 


Hey What's For Dinner

Wednesday, February 2, 2011

Mexican Rice Bake


You can't go wrong with Mexican food, at least not at my house.  My kids will always eat it if I say it is "Mexican food."  This recipe is from "Family Feasts for $75 a Week."  This cookbook has some great, simple recipes and it also has some great tips for shopping and saving money.

This is a casserole type meal.  I serve it with either corn chips and salad or homemade flour/corn tortillas and other burrito type fillings such as lettuce, tomatoes, sour cream, salsa and of course some extra cheese.

MEXICAN RICE BAKE
  • 1 lb. lean ground beef
  • 1/2 cup onion, finely chopped
  • 1 clove garlic, chopped
  • 1/2 cup green bell pepper, chopped
  • 1 (14 oz.) can tomato puree (2 cups)
  • 3 cups water
  • 1-1/2 cups uncooked long-grain white rice
  • 1 T. chili powder
  • 1 t. salt
  • 1 t. brown sugar
  • 1/4 t. ground cumin
  • 1/2 t. Worcestershire sauce
  • 1/2 t. black pepper
  • 1/2 cup Cheddar cheese, shredded
  • 2 T. fresh cilantro, chopped
Preheat oven to 375 degrees.  Preheat a large heavy skillet, preferably cast iron (I use a magic pot), until hot.  Add ground beef and cook until no longer pink, breaking into small pieces.  Reduce heat to medium low, and drain off the excess fat.  Stir in onion, garlic and and bell pepper.  Cook, stirring occasionally, until the veggies begin to soften.  Add remaining ingredients, up to black pepper, cooking over medium-high heat until simmering.  If you are not using a cast iron skillet or magic pot, carefully pour contents of skillet into a 2 quart ovenproof casserole  dish. Bake 20 to 25 minutes, stirring once, until rice is tender.  Remove from oven and sprinkle with cheese and cilantro.

*The magic pot.  What is that?  The magic pot is any cast iron skillet that is coated with enamel.  I have a couple, but my favorite is my 3 quart, casserole size, which you see above.  It is a Tramontina, which I got for a steal at Tuesday Morning. 

You can find more great ideas at Works for me Wednesday. 

Tuesday, February 1, 2011

Swag Bucks!

Have you signed up for Swag Bucks?  Have you downloaded the Swag Bucks search engine?  I have.  I use my toolbar for my daily searches. 

How does it work....Use their search engine for your daily searches and earn Swag Bucks.  Redeem Swag Bucks in the Swag Store.  Get friends to join through you and earn up to 1000 Swag Bucks...1 buck for each buck your friend earns up to 1000 bucks.

I have redeemed 33 prizes so far...that translates into thirty-three $5 Amazon gift cards.  Of course there are many other prizes, but we like books and we home school so we need money for books!

If you want to join through me and earn me more bucks....click on the Swag Bucks box at the bottom of this blog.  It is easy to sign up for.   Once you download he search engine, you are ready to go. 

Green Bean Casserole

This recipe is long over due.  What did you leave out for Santa on Christmas Eve?  Did you just leave the traditional cookies and milk?  We knew better.  We knew he was sick of cookies and milk.  Santa loves bacon, onions and garlic fried together.  Just the aroma alone made him leave more gifts!

I would also like to say this casserole has nothing from a can.  Yes people, you can make green bean casserole without cream of fungus soup. 


Check out the happy grin!


The recipe called for blanched green beans.  I like mine a little softer, so I steamed them for about 20 minutes.


After making the roux, mix in the bacon, onion and garlic mixture. 


Now add in 1 jar of drained pimentos.  So purdy.


I have a couple of magic pots.  This magic pot is a 3 quart magic pot, so it holds the same amount as a 13x9 inch Pyrex.  You could of course make this in another, non-oven proof pan and then bake it in a 13x9 inch Pyrex, but magic pots make everything taste better.

Oh yes, and toss green beans with the yummy, drink it from a straw sauce.


All mixed up and ready to bake.


All golden brown, bubbly and totally amazing.

GREEN BEAN CASSEROLE
The original recipe can be found at Pioneer Woman.
  • 2 pounds Fresh Green Beans, Ends Cut Off (Frozen work fine too...that is what I used)
  • 4 slices Bacon, Cut Into 1/4 Inch Pieces
  • 3 cloves Garlic, Minced
  • ½ whole Large Onion, Chopped
  • 4 Tablespoons Butter
  • 4 Tablespoons All-purpose Flour
  • 2-½ cups Whole Milk
  • ½ cups Half-and-half
  • 1-½ teaspoon Salt, More To Taste
  • Freshly Ground Black Pepper, To Taste
  • ⅛ teaspoons Cayenne Pepper
  • 1 cup Grated Sharp Cheddar Cheese
  • 1 jar (4 Ounce) Sliced Pimentos, Drained
  • Extra Milk For Thinning If Necessary
Cut green beans in half if you like pieces to be a little smaller.  Steam green beans for 20 minutes or  blanch. Add bacon pieces to a skillet over medium heat. Cook bacon for two minutes, then add diced onion and garlic and continue cooking for 3 to 5 minutes, or until bacon is done (but not crisp) and onions are golden brown. Remove from heat and set aside.  In a separate skillet or saucepan, melt butter over medium heat. Sprinkle flour into the pan and whisk immediately to evenly mix it into the butter. Cook for a minute or two, then pour in milk and half and half. Continue cooking, whisking constantly, while sauce thickens, about 2 minutes. Add salt, pepper, and cayenne then add the grated cheddar. Stir while cheese melts. Turn off heat.  Add pimentos to pan, then add bacon/onion mixture. Stir to combine. Pour over green beans and stir gently to combine. Pour into a baking dish.  Bake at 350 degrees for 30 minutes or until sauce is bubbly.

Please see Tasty Tuesday for more yummy recipes.