Wednesday, December 22, 2010
Tuesday, December 21, 2010
Homemade Potato Chips
This is what happens when your husband watches Food Network! He saw a show about a place on the East Coast which serves Ribs N' Chips. Homemade potato chips to be exact. Since we were going to have hamburgers for dinner making chips seemed like the right thing to do. It was really quite easy, especially since Rowdy did all the work.

Thinly slice potatoes.

Soak slices in a bowl of ice water to do something to the starch...not sure what.

Some more great photography! Pat the potatoes dry on a towel.

Heat oil to 350 degrees in the magic pot. Once oil is hot, drop in a layer of chips and fry until golden.
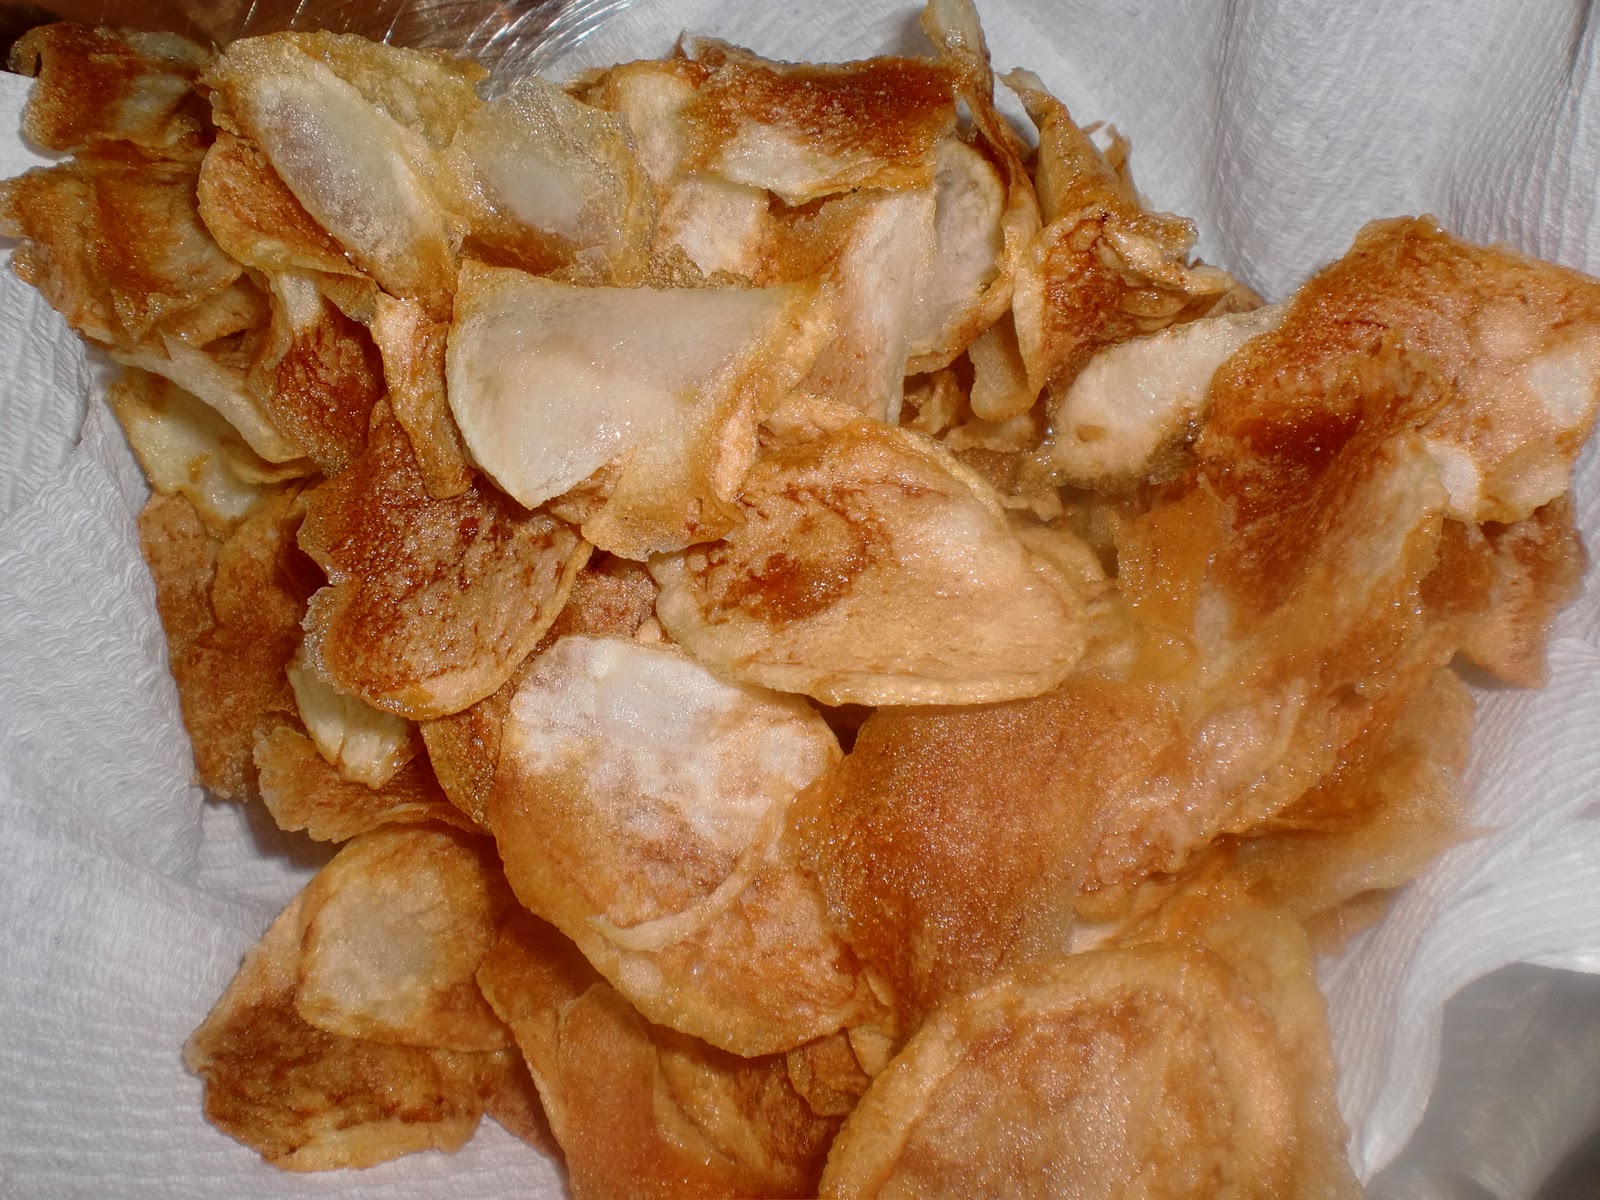
Drain on a paper towel and try not to eat them all before you cook the hamburgers.

Yummy!
Homemade Potato Chips
- Russet potatoes, with or without peels
- Canola oil
- Salt or seasoning of choice
Thinly slice potatoes with whatever method you have. I used my Kitchen Aid slicer/grater attachment. You could also use a food processor or a really sharp knife. Soak potatoes in a bowl of ice water for at least one hour. After soaking potatoes, pat dry with a non-fuzzy towel. Heat oil to 350 degrees. We have an instant read thermometer that we stuck in to see when oil was hot enough. Start frying potatoes in small batches until golden brown and drain on paper towels. Sprinkle with salt immediately upon removing from grease. I liked my a little chewy (but still cooked all the way) and everyone else liked them really crispy.
This post is linked up with Tasty Tuesday.
Wednesday, December 15, 2010
Pretzel, Kiss, M&M Thingy's
This is a fun treat. We make them every year. This is one the kids can pretty much do on their own, that is if you trust them to not eat all the candy! I am a salty/sweet kind of girl. These are perfect for the salty/sweet people.

What you need:
- Checkerboard or windowpane pretzels
- M&M's
- Hershey Kisses
Preheat oven to 170 degrees. Line a cookie sheet with parchment paper or wax paper. Spread out pretzels. Carefully supervise as kisses are unwrapped to be sure that you will have some for the actually finished product! Place one kiss on each pretzel. Place cookie sheet in oven and watch carefully. Set timer for 5 minutes. After the first five minutes gently try to press an M&M into the kiss. If it seems a little firm still check every 30 seconds to 1 minute with the M&M. They will go from hard to melty really quick! When kisses are the right mushiness, remove from the oven and press one M&M into each kiss. Let cool until chocolate hardens. If you can't wait, place in fridge until chocolate is hard. Kisses Hugs make really cute pretzel thingys. Hugs melt a lot faster than the solid milk chocolate so you will need to check them sooner than 5 minutes.
This post has been linked up with Works For Me Wednesday.
This post has been linked up with Works For Me Wednesday.
Tuesday, December 14, 2010
Peanut Butter Oatmeal Muffins
I am attempting to make a comeback. All comebacks should involve peanut butter. Everyday should involve peanut butter, even if it is just a spoonful to give you a little boost in the afternoon. All my chicks love this recipe.


Combine the dry ingredients.

Here is the finished batter...it is a very wet batter.

Be sure that your assistant gives the batter a taste test.

Enjoy!
Peanut Butter Oatmeal Muffins
- 1-1/4 cups whole wheat or all-purpose flour
- 3/4 cup quick-cooking oats
- 3/4 cup Demerara or packed brown sugar
- 3 teaspoons baking powder
- 1/2 teaspoon salt
- Dash ground cinnamon
- 1 egg
- 1/4 heaping cup peanut butter (please do not use reduced fat!)
- 1-1/4 cups milk
- 1/2 cup chopped peanuts, optional
Preheat oven to 375 degrees. Combine dry ingredients. Stir to combine. Pour in milk, egg and peanut butter. Mix well. The batter will seem kind of runny for a muffin batter, but trust me, they will be muffins in the end. Bake for 15 to 18 minutes, until toothpick comes out clean. Cool in pan 5 minutes before removing. Makes 12 muffins.
This post was linked up with Tasty Tuesday.
This post was linked up with Tasty Tuesday.
Friday, December 3, 2010
Toffee Squares

Try Cleta Bailey's Toffee Squares and you will not be disappointed. There is no boiling sugar involved, no candy thermometer involed, no burning your skin off while dealing with molten sugar involed, just a simple, yummy with coffee treat!

Monday, November 29, 2010

Monday, November 22, 2010
I Will Return!
There will be a slight pause here....but I will return, for the three of you who care.
Sunday, November 14, 2010
Atlantic vs. Pacific

Yes, we had the whole beach to ourselves. This is why homeschooling is awesome.

The shells....the Atlantic has tons of shells! The kids were in heaven.

The water is so clear....and warm, even in November.

If this were the pacific my people would not be swimming!
The bummer is that we live in California, we visit the Pacific often and it is beautiful in its own way, but as my friend Brit says the Atlantic is "AWESOMER."
Friday, November 12, 2010
The "Famous Pork Sandwich"

We just returned from North Carolina. Such a lovely, dreamy place. We visited the Snappy Lunch, which is the place made famous by Andy Griffith (Mt Airy being his hometown). Andy mentioned it by name on his Mayberry show and frequented the restaurant as a young man. The place is a lunch counter in the most simplest terms. They are famous for their Pork Sandwich. The sandwich is made from boneless, tenderized loin chop dipped in sweet-milk batter and fried (on a grill) until golden crisp. It is improbably large, sandwiched in a bun along with the usual All-The-Way condiments that include two slices of tomato, chopped onion, mustard, cole slaw, and special chili sauce. This is what they call All-The-Way in North Carolina and you are pretty weird if you don't eat most things All-The-Way. If you ever get to North Carolina you must stop at the Snappy Lunch counter. You will find it right next door to Floyd's Barber shop.
Monday, November 1, 2010
The Hand that Rocks the Cradle
Listen here to be encouraged if you are The Hand That Rocks the Cradle.
The Hand That Rocks The Cradle
The Hand that rocks the Cradle
Is The Hand That Rules The World
Blessings on the hand of women!
Angels guard its strength and grace,
In the palace, cottage, hovel,
Oh, no matter where the place;
Would that never storms assailed it,
Rainbows ever gently curled;
For the hand that rocks the cradle
Is the hand that rules the world.
Infancy's the tender fountain,
Power may with beauty flow,
Mother's first to guide the streamlets,
From them souls unresting grow--
Grow on for the good or evil,
Sunshine streamed or evil hurled;
For the hand that rocks the cradle
Is the hand that rules the world.
Woman, how divine your mission
Here upon our natal sod!
Keep, oh, keep the young heart open
Always to the breath of God!
All true trophies of the ages
Are from mother-love impearled;
For the hand that rocks the cradle
Is the hand that rules the world.
Blessings on the hand of women!
Fathers, sons, and daughters cry,
And the sacred song is mingled
With the worship in the sky--
Mingles where no tempest darkens,
Rainbows evermore are hurled;
For the hand that rocks the cradle
Is the hand that rules the world.
...William Ross Wallace
Potato Skins

Scrub potatoes, rub with canola oil and bake in a 400 degree oven.

Scoop out most of the potato.

Brush both sides with canola oil and sprinkle liberally with salt. Place cut side down on baking sheet.

Flip'em over and bake until crisp.

These are the PW's potato skins. They are tasty and they aren't deep fried (sorry to my friend who loves the deep fryer and hairy wings!) This is one of those recipes that can be adjusted easily to feed a crowd or just a few.
Potato Skins
- Russet Potatoes
- Bacon
- Canola oil
- Kosher salt
- Sharp Cheddar Cheese
- Sour cream
- Green onions
Preheat oven to 400 degrees. Scrub the potatoes and rub with canola oil. Bake for 45 minutes to 1 hour, until potatoes are fork tender. While potatoes are baking, fry bacon and drain on paper towel. Slice potatoes in half lengthwise. Be careful during this step not to burn your fingerprints off. Scoop out inside leaving a small margin of potato in the skins. Brush both sides with canola oil and sprinkle with salt. Place the potatoes, skin side up, on a cookie sheet and return to the oven. Bake for 7 minutes, then flip the skins to the other side. Bake for 7 minutes more or until the skins are crispy. Sprinkle desired amount of grated cheese and bacon bits into each skin and place back in oven just until cheese is melted. Just before serving add a dollop of sour cream and a sprinkling of green onions. Yum!
This post is linked up with Tasty Tuesday at
This post is linked up with Tasty Tuesday at

Saturday, October 30, 2010
Pumpkin Butterscotch Muffins

It is that pumpkin time of year. This is one of my favorite pumpkin recipes. My kids love these!
Pumpkin Butterscotch Muffins
- 2 1/2 cups flour
- 1 tablespoon baking powder
- 1 teaspoon baking soda
- 1/2 teaspoon salt
- 1 1/2 cups brown sugar
- 2 teaspoon cinnamon
- 3/4 teaspoon nutmeg
- 1 3/4 cups pumpkin
- 4 eggs
- 1/2 cup oil
- 2 cups nuts, optional
- 2 cups butterscotch chips
Thursday, October 28, 2010
White Bread


Yes, wheat bread is better for you. Yes, I have a wheat grinder and 1500 pounds of wheat. But white bread my friends, homemade, warm and slathered with butter is comfort food. It also makes superior grilled cheese sandwiches.
Sassy's White Bread
- 1-1/2 c. warm water
- 1/4 c. demerara, turbinado or good ol' white sugar
- 1 T. yeast
- 4 c. flour
- 1 t. salt
In the bowl of your standing mixer combine water and sugar. Sprinkle yeast on top and let proof for 5 minutes. (I never skip the proofing. How will you know if your yeast did not activate, if the water killed it because it was too hot or if the yeast was just plain old dead?) Once the yeast has become slightly foamy you know it is time for flour and salt. Add in flour and then salt and knead with your dough hook for 5 minutes. You may need to add a little more water or a little more flour depending on the consistency of your dough. Your dough should be nice and smooth and the sides of the mixing bowl should be clean. Once your dough has kneaded for 5 minutes, shape into a ball, place back in mixing bowl and cover with a towel. Let rise 30 to 45 minutes, until doubled. Once doubled, gently deflate and shape into a loaf shape. Place dough in a greased loaf pan, cover with towel and let rise 30 to 45 minutes, until almost doubled. Preheat oven to 350 degrees and bake for 35 minutes, until golden brown. After removing from oven, let bread sit in pan for about 5 minutes. This sort of steams the crust so it is not has hard and weird kids will eat it because the crust is not too hard/crunchy. This recipe makes a 12 inch loaf. I have the Norpro 12 inch Nonstick Bread Pan. It is a dream. Just a little bit of nonstick spray and the bread just pops right out every time.
Wednesday, October 27, 2010
Black Bean Soup

There is nothing quite like the smell of new born babe...the best smell next to that would have to be bacon, onions and garlic frying.

You can use regular chicken broth or you can use this extra tasty stuff.

Black bean soup garnished with grated cheese and sour cream.
Hello my 32 faithful followers! I am back. There is a chill in the air. Cold enough to stay under the down comforter all night. Cold enough to wear socks in the morning. Cold enough to eat soup, chili and stew any night of the week. I will definitely double this recipe next time. My oldest was not feeling well and she did not eat any and there was only 1 bowlful left. I like to have enough left for the next day...at least for the 2nd born who despises the sandwich. Even the 3rd born, the pickiest of pickies gobbled this down. This says a lot. If it is not Mexican or pizza or hamburgers...he would rather starve than eat. He comes by this honestly. I think Rowdy only ate peanut butter and jelly for the first 12 years of his life. Since his momma wanted him to eat something hot, she started serving up grilled peanut butter and jelly. I will have to do a post on the unusual art of the grilled peanut butter and jelly soon.
Black Bean Soup
- 1 lb. dry black beans
- 7 slices of bacon
- 1/2 an onion
- 3 large garlic cloves
- 1 t. chili powder
- 1 t. cumin
- 4 c. chicken broth or water mixed with Better than Bouillon
The night before, pick through beans and remove any rocks, etc. and soak in a large bowl of water or in your crock pot. The next day, drain and rinse beans thoroughly. Put beans in crock pot with chili powder, cumin and chicken broth. Chop bacon (I cut it up with kitchen scissors) into small pieces and throw in a medium sized frying pan. Begin to cook over medium heat until some fat renders. Add onion and garlic. Cook until bacon is almost crisp and onion is clear. This will smell heavenly. Throw the bacon mixture into the crock pot and cook for 8 hours on low or 4-1/2 hours on high (I cooked my on high). Just before serving remove half of the beans to a blender and blend until smooth. Return to crock pot and mix thoroughly. Serve with shredded cheese and sour cream.
Tuesday, October 19, 2010
Cast Iron Cornbread
I grew up eating cornbread this way. It is the yummiest way to cook it. Nice and crispy, almost fried on the edges. The only difference between now and then is that I add sugar. I am half Yankee after all! I just don't know how those Southerner's do it without sugar.

The dry ingredients.

Throw in the buttermilk and the egg. You could mix them in a separate bowl and then add them in, but then you would have another dirty bowl.

This batter will be nice and thick.

My skillet looks a little dry. I am not that good at keeping it seasoned well, but the butter will help to season it some.

Here it is, just put in the oven (I forgot to take a picture before I put it in the oven). Look what the butter does. It sneaks up over the top.....

Cornbread
- 1 1/4 cups yellow cornmeal
- 1 1/4 cups all-purpose flour
- 2 tablespoons sugar (I use demerara)
- 1 1/2 teaspoons baking powder
- 1/2 teaspoon baking soda
- 1 1/4 teaspoons coarse salt
- 1 large egg
- 1 3/4 cups buttermilk
- 4 tablespoons unsalted butter
Preheat oven to 425 degrees. Combine dry ingredients in a mixing bowl. Add egg and buttermilk and mix well. Once oven is heated to 425 degrees place 10 to 11 inch cast iron skillet into over with 4 tablespoons unsalted butter. Watch carefully to not burn butter, but melt the butter completely. Be careful, the pan will be HOT. Swirl the butter around in the pan and then pour in the batter. Spread batter out evenly. Return to oven and bake for 18 to 25 minutes, until toothpick test comes out clean. Mine only took about 18 minutes, but my skillet is 11-3/4 inches. Slice into wedges and serve. No extra butter needed. This stuff is already very buttery. I serve this last night with White Chicken Chili.
Tuesday, October 12, 2010
Cheese Enchiladas With Homemade Chili Gravy

Bowl o' spices.

The roux.......

Once you have cooked the roux for 5 minutes or so, add the bowl o' spices and cook another 5 minutes until fragrant.

The finished sauce...yummy.

After putting about 1/2 a cup of sauce in bottom of a 13x9 inch pan, start assembling enchiladas, placing seam side down. These babies are stuffed with cheese and finely diced onion.

Ready for the oven, sprinkle with more cheese and more diced onion.

I did alter the original recipe a bit. First off, I double the recipe because we like to eat...one pan was not enough. I also reduce the salt and cumin a bit and it was still very well seasoned. The recipe below will make about 2-1/4 to 2-1/2 cups sauce.
Chili Gravy
- 1/4 cup lard or vegetable oil
- 1/4 cup flour
- 1/2 teaspoon black pepper
- 1/2 teaspoon salt
- 1 1/2 teaspoons garlic powder
- 1-1/2 teaspoons ground cumin
- 1/2 teaspoon dried oregano (Mexican oregano if you have it)
- 2 tablespoons dark chili powder
- 2 cups chicken broth
Make a roux with vegetable oil and flour. Cooking for about 5 minutes, until lightly golden and fragrant. Add spices and continue stirring for another minute. Add chicken broth, stirring to prevent lumps. Bring to a boil and then reduce to a simmer for 15 minutes. It's that simple. You now have homemade enchilada sauce, which will taste at least 1000 times better than anything in a can.
Enchiladas
- 12 to 14 homemade tortillas, but I suppose store bought if you must
- 3 plus cups cheese
- Diced onion, I like a lot, do what you like...maybe none.
- Chili gravy
Pour about 1/2 a cup of sauce in the bottom of a 13x9 inch pan that has been sprayed with nonstick spray. Begin assembling enchiladas. My tortillas were nice and soft because I had just made them so they were no problem to roll. If your tortillas are a little stiff, warm them slightly (in microwave or in frying pan) to soften to they don't crack and break during assembly. Once your pan is stuffed full of enchiladas, pour the remaining sauce evenly over the top. Sprinkle with more cheese and onions. Bake at 450 for 20 or so minutes, until sauce is bubbly and the cheese is melted.
Monday, October 11, 2010
Tortillas...Corn or Flour?
Flour or corn, corn or flour...what about flour-corn? These are so tasty. They are also much easier and faster than making straight flour tortillas. This would really be a snap with a tortilla press...but I made my own. I made a double batch, which was 30 tortillas. From there I made the most awesome enchiladas with homemade enchilada sauce. This truly was a labor of love. Rowdy really likes enchiladas. I am not a fan of canned sauce so I don't make them often. Canned sauce tastes nothing like the real stuff, it doesn't even look like the real stuff.
Of course I didn't come up with this on my own...credit once again goes to Chickens in the Road.


This is actually the lid to my cast iron dutch oven, which can also be used as a frying pan if you flip it over. I am using it as the base of my tortilla press. I put a towel under to protect the counter. On top of the pan is a large Ziploc that has been cut down the sides. In the center is a 2 ounce ball of dough.

This is the dutch oven pot. I placed in on the ball of dough and pressed down quite hard.

Here is the pressed dough ball.
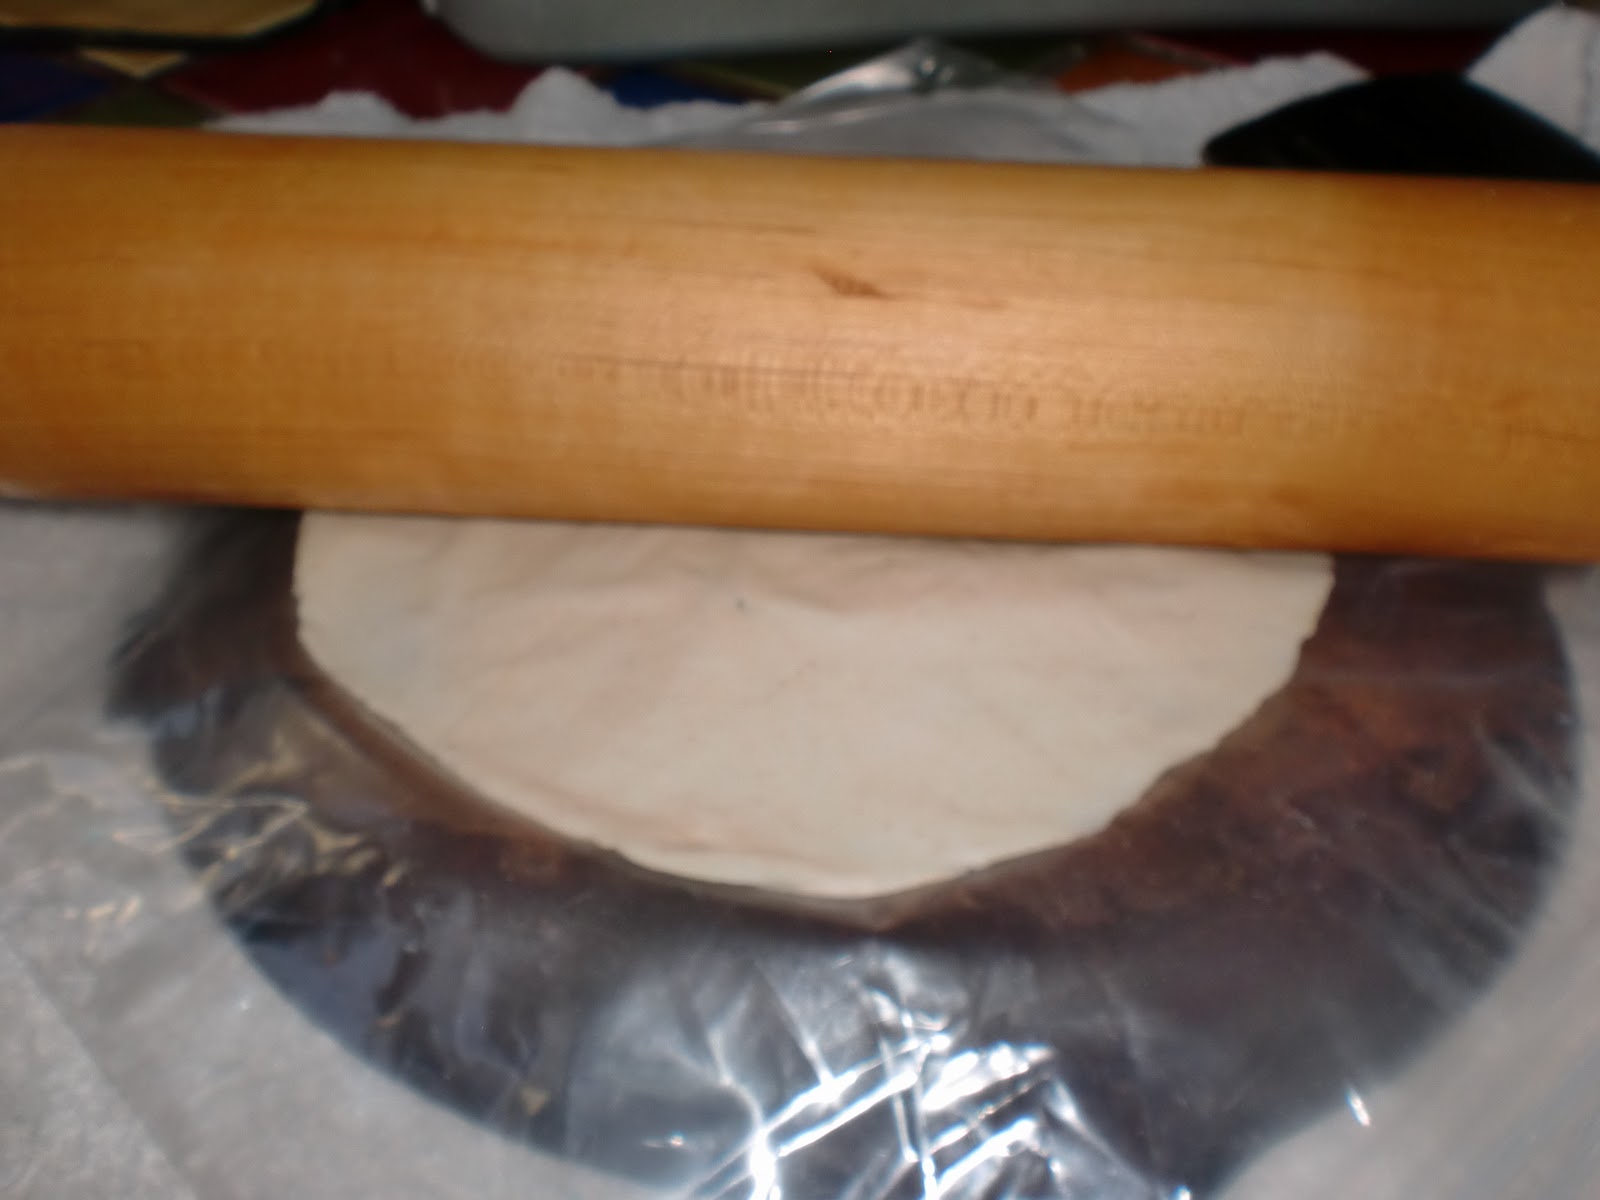
I rolled it out even further with a rolling pin.

Then cook the tortilla in a cast iron skillet, about 45 seconds per side. I know that my pan looks unseasoned. This happens when you cook a bunch of tortillas in it. When I was done, I rinsed the pan and oiled it with a paper towel.

Soft Flour-Corn Tortillas
- 1 1/2 cups all-purpose flour
- 1 1/2 cups masa harina
- 1 teaspoon salt
- 1/4 cup shortening or lard
- 1 1/2 cups lukewarm water
Mix the flours and salt in a medium-size bowl. Cut in shortening with a pastry cutter. Stir water in (add a little at a time after the first cup) and mix the dough as much as possible with a fork or spoon. Knead, adding water, until you have a pliable dough. (Not too wet! Be careful adding the water after the first cup. You may not need the entire cup and a half.) Cover bowl and let rest for about 20 minutes. Sprinkle a bit of flour in the bowl and knead again briefly. Divide dough into 14 to 16 balls. I weighed out my dough into 2 ounce portions and ended up with 15 tortillas per batch. Place a cast iron skillet on high heat. (Cast iron works best–you need something that can take high heat with no oil.) Flatten your tortilla with what ever method you prefer. I do not have a tortilla press, which would be handy. Maybe I will ask for one for Christmas. In the meantime, I used two cast iron pans. I cut open a large Ziploc bag and placed 1/2 of it on one pan, then placed a ball of dough in the center. Next, I folded the other 1/2 of the bag over the dough ball and pressed down quite hard with another cast iron pan. This did not get the dough quite as thin as I wanted, so I just used my rolling pin, on top of the plastic to spread the dough out a little more.
Tomorrow....


Subscribe to:
Posts (Atom)