Thursday, July 29, 2010

Sugar Cookies

These are my favorite sugar cookies.  They are slightly crisp and buttery with big sugar crystals all over the outside.  I found this recipe at  Savory Sweet Life.  She has some really tasty looking recipes on her site.

Sugar Cookies

  • 1 1/4 cups white sugar
  • 1 cup salted butter
  • 3 egg yolks
  • 2 teaspoons vanilla extract
  • 2 1/2 cups all-purpose flour
  • 1 teaspoon baking soda
  • 1/2 teaspoon cream of tartar
  • 1/4 teaspoon of salt
  • 1/3 cup coarse sugar crystals or regular granulated sugar for rolling cookies (we used demerara sugar and it probably took about 1/2 cup)


Preheat oven to 350 degrees F. Cream together butter and sugar until it is nice and creamy. Mix in 1 egg yolk at a time and vanilla extract. Mix dry ingredients together and add to the butter mixture, mixing completely.  Be sure to scrape down the bowl to be sure everything is mixed. Using a medium scoop (we used the large side of a melon baller), form dough balls and roll them in sugar crystals. Place cookie balls on a cookie sheet lined with parchment paper 2 inches apart from one another. Be sure not to flatter any of the dough. Bake for 12-14 minutes until the surface of each cookies have a cracked like texture. Remove from oven and allow cookies to remain on the cookie sheet for 5 mintues before transferring to a cooling rack. Enjoy!  Makes about 32 cookies. 

Tuesday, July 27, 2010

Sausage and Cheese Braid


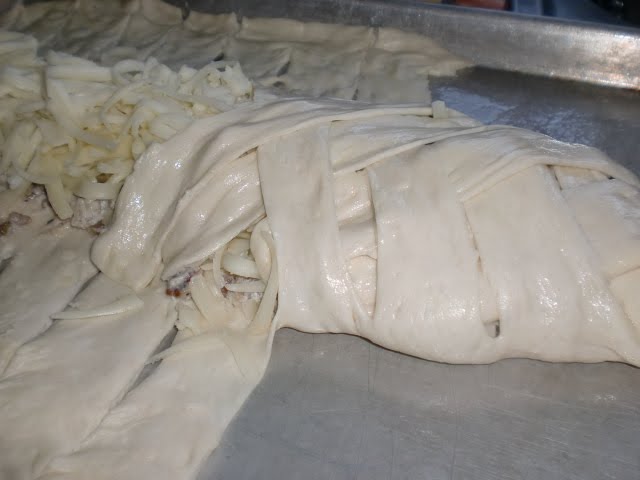
This is how you assemble the sausage and cheese braid.


Just out of the oven!


I love cheese.

Sausage and Cheese Braid

Dough:

  • 1-1/2 c. water
  • 1 t. yeast
  • 4 c. flour
  • 1 t. salt
  • 1/4 olive oil
Filling:

  • 1 lb. Italian sausage (or ground beef with Italian seasoning if you don't like sausage)
  • 1/2 onion, diced
  • 2 cloves garlic, minced
  • 1 c. ricotta cheese
  • 3 c. Mozzarella cheese
Dough:  Combine water and yeast in mixer bowl. Let proof 5 minutes. Add flour, salt and olive oil. Knead with dough hook, adding more flour as needed until dough pulls away from the side of the bowl. Knead for 5 minutes. Let rise for 20 minutes or so...no need to have poofy dough for this recipe.

Filling: Meanwhile, fry sausage with onion and garlic cloves until completely cooked and vegetables are soft. Drain off grease. Mix in ricotta.

Assembling: Once dough is done divide in half and pat out into two large rectangles. Put half the sausage mixture down the middle of each dough rectangle and then top with 1-1/2 cups cheese on each rectangle. To make the braid (see picture above) cut the sides of the dough just about to the filling in strips that are about 1 inch wide. Starting at one end, cross the strips over one another until you get to the other end.  Crimp ends closed and fold under.  Beat egg and lightly brush over the tops of the braids. Bake at 375 degrees for 25 minutes or until golden brown.  Let cool 5 minutes before cutting. Makes 2 large braids.


Monday, July 26, 2010

Sunday, July 25, 2010

Garden Fresh Galettes


Yellow squash galette before baking.


Hot out of the oven...oh my!


Yellow Zebra tomatoes, basil and zucchini galette before baking.


I was searching the Internet for recipes that involve squash.  When you grow squash you usually have to figure out what to do with it.  New ways to serve it because it is an abundant producer.  I came across this recipe at Smitten Kitchen and it was AWESOME.  It was the best thing to come out of my kitchen in a long time.  I altered the original recipe only slightly by using yellow squash, adding more garlic and not using basil.  I saved the basil to go with the tomato version.  What are you going to top your galette with?

Garden Fresh Galette

Pastry:

  • 1 1/4 cups all-purpose flour, chilled in the freezer for 30 minutes
  • 1/4 teaspoon salt
  • 8 tablespoons (1 stick) cold unsalted butter, cut into pieces and chill again
  • 1/4 cup sour cream
  • 2 teaspoons fresh lemon juice
  • 1/4 cup ice water

Filling for squash galette:
  • 1 large or 2 small zucchinis, sliced into 1/4 inch thick rounds
  • 1 tablespoon plus 1 teaspoon olive oil
  • 2 medium garlic clove, minced (about 1 teaspoon)
  • 1/2 cup ricotta cheese
  • 1/2 cup (about 1 ounce) grated Parmesan cheese
  • 1/4 cup (1 ounce) shredded mozzarella
Glaze:
  • 1 egg yolk beaten with 1 teaspoon water
Make dough: Whisk together the flour and salt in a large bowl. Sprinkle bits of butter over dough and using a pastry blender, cut it in until the mixture resembles coarse meal, with the biggest pieces of butter the size of tiny peas. In a small bowl, whisk together the sour cream, lemon juice and water and add this to the butter-flour mixture. With your fingertips or a wooden spoon, mix in the liquid until large lumps form. Pat the lumps into a ball; do not overwork the dough. Cover with plastic wrap and refrigerate for 1 hour. I made mine in the morning and used it at dinner time.  I just took it out about 5 minutes before rolling it out.

Make filling: Spread the zucchini out over several layers of paper towels. Sprinkle with 1/2 teaspoon salt and let drain for 30 minutes; gently blot the tops of the zucchini dry with paper towels before using. (I thought this was really cool!  What was beaded up on top of the zucchini...amazing.) In a small bowl, whisk the olive oil and the garlic together; set aside. (I made my garlic oil in the morning so that the flavor could really get into the oil.) In a separate bowl, mix the ricotta, Parmesan, mozzarella, and 1 teaspoon of the garlicky olive oil together and season with salt and pepper to taste.

Prepare galette: Preheat oven to 400 degrees. On a floured work surface, roll the dough out into a 12-inch round on parchment paper. Transfer to an ungreased baking sheet. Spread the ricotta mixture evenly over the bottom of the galette dough, leaving a 2-inch border. Shingle the zucchini attractively on top of the ricotta in concentric circles, starting at the outside edge. Drizzle the remaining tablespoon of the garlic and olive oil mixture evenly over the zucchini. Fold the border over the filling, pleating the edge to make it fit. The center will be open. Brush crust with egg yolk glaze.

Bake the galette until the cheese is puffed, the zucchini is slightly wilted and the galette is golden brown, 30 to 40 minutes. Remove from the oven, sprinkle with basil, let stand for 5 minutes, then slide the galette onto a serving plate. Cut into wedges and serve hot, warm or at room temperature.

Tomato/Basil galette: 
  • 2 tomatoes, sliced thin and placed on paper towels to drain for about 10 minutes. Blot top just before using.
  • 20 or so basil leaves
  • Zucchini slices if desired

Assemble the same as above, placing basil leaves on top of cheese mixture and layer with tomatoes and zucchini if desired.

This post is linked to Meatless Monday.

This post is linked to Tasty Tuesday.

Saturday, July 24, 2010

Chocolate Pie with a Cloud of Whip Cream


This is my mom's chocolate pie.  It is super rich and super delicious. I was always afraid to make it because of the egg whites.  I was afraid of egg whites.  Not sure why.  If you have a KitchenAid mixer you should not fear the egg white.  All things are possible with the KitchenAid.  If I could only have one appliance in my kitchen it would be my mixer.

This pie calls for a prebaked pie crust.  You could use a cookie crust, store bought or homemade.  I prefer the saltiness of regular pie crust.  This is my go to pie crust for prebaked crust needs.  You don't have to roll this crust, you just press it into the pan.  I saw this crust on on Cook's Country and you can look over there for the particulars. This post is more about the filling and the best part, the cloud of whipped cream.

Chocolate Pie

  • 1 prebaked crust

  • 1 12 ounce package semisweet chocolate chips

  • 2 T. milk

  • 2 T. sugar

  • 4 eggs, separated

  • 1 t. vanilla
Separate eggs, placing whites in bowl of mixer and yolks in another bowl. Begin beating whites on medium speed and once they begin to look foamy, after about one minute, turn the speed to medium-high and let beat until stiff peaks form. While the whites are beating, place chocolate chips, sugar and milk into a microwave safe bowl. Microwave at 30 second intervals, stirring in between, until chocolate is completely melted and smooth. Beat egg yolks, one at a time, into chocolate mixture and then add the vanilla. Fold in the egg whites.  This takes some work.  You want a uniform color to your chocolate and no white clumps, so be patient, while gently folding the two mixtures together. Once fully combined, pour into prebaked pie crust and refrigerate for at least 2 hours before serving.  Top with a cloud of whip cream.

Cloud of Whipped Cream

  • 1 pint heavy whipping cream, cold

  • 2 T. sugar

  • 1 t. vanilla
Chill your mixing bowl in the freezer for 30 minutes prior to making whipped cream.  Pour cream into mixer and begin beating with whisk attachment. When it starts to thicken, after about 2 minutes, add sugar and vanilla and continue whipping until to desired consistency.  I whip mine until it is just about stiff peak stage.  

Thursday, July 22, 2010

Grilled Cheese with Balsamic Onion Marmalade

Gooey Goodness.  I love a grilled cheese sandwich.  I love a patty melt and always thought that a patty melt would be just as yummy without the patty and I was right.


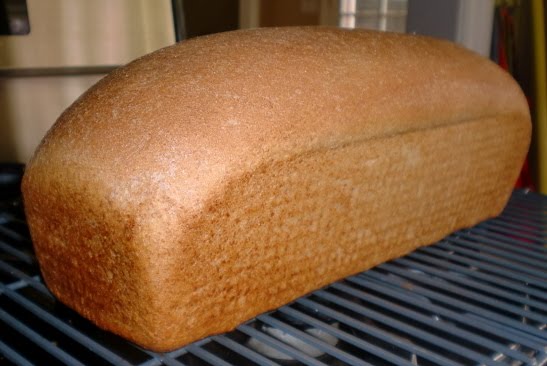
Early in the day I made a loaf of plain old white bread.  I mean plain.  Water, yeast, flour and salt.  No sweetener.  This makes a great grilled cheese sandwich, nice and crisp.


Balsamic Onion Marmalade

  • 1 T. olive oil

  • 4 medium onions, thinly sliced

  • Salt and pepper to taste

  • 1/3 cup sugar

  • 2/3 cup balsamic vinegar
Thinly slice onions. Saute onions in frying pan with oil, salt and pepper on medium heat for 20 minutes, until onions are soft.  Add the sugar and reduce the heat to medium-low. Cook, stirring frequently, for about 10 minutes, until the onions appear dry. Add the vinegar and reduce the heat to low. Continue cooking, stirring occasionally, for about 1 hour, until the onions are soft and dry. Serve warm or at room temperature. Store the marmalade in the refrigerator. It will keep for several weeks

To make your sandwich you will need to gather the following:


  • Bread:  I think this sandwich is great on white, but am sure it would be great on sourdough or rye as well.

  • Cheese:  I used jack cheese because this is what I had on hand. 

  • Butter
To assemble your sandwich spread one side of bread with butter and put on griddle. Place a slice of cheese, desired amount of onions and another slice of cheese on bread. Top with another slice of buttered bread.  Grill until crisp on the outside and cheese is melted.  Delicious.

Wednesday, July 21, 2010

More Tomatoes!


This is what we picked this morning!  I will definitely be planting Yellow Zebra Tomatoes again.  They are big and sweet.

Tuesday, July 20, 2010

Whole Wheat Oatmeal Chocolate Chip Cookies


I love it anytime I can get a great whole wheat recipe, especially one that is a treat!  We had some friends over last weekend.  They live on a real farm.  Andrea brought these most delicious cookies and I was shocked that they were whole wheat.  The big chicks whipped some up after lunch and they turned out great.


Whole Wheat Oatmeal Chocolate Chip Cookies
  • 3/4 C. rolled oats
  • 1 C. whole-wheat flour
  • 1/2 tsp. baking soda
  • 1/2 tsp. salt
  • 1/4 C. butter, softened
  • 1/4 canola oil
  • 1/3 C. sugar
  • 1/3 C. brown sugar
  • 1 large egg
  • 1 tsp. vanilla
  • 1 C. chocolate chips
Preheat oven to 350 degrees. Coat 2 baking sheets with cooking spray.  Grind oats in a blender or food processor into a flour like consistency. Transfer to a medium bowl and stir in flour, baking soda and salt. Beat butter in mixer until fluffy. Add oil, both sugars, egg and vanilla and beat until smooth and creamy. With the mixer on low, add the dry ingredients and beat until just combined. Stir in chocolate chips.  Drop dough by heaping teaspoonfuls, at least 1 inch apart onto baking sheets. Bake, 1 sheet at a time, until firm around the edges and golden on top, about 12 to 15 minutes. Cool the cookies for 2 minutes on baking sheets, then transfer to wire racks to cool completely.  Makes about 2 dozen cookies.

This post is linked to Works For Me Wednesday.  I am sure these cookies would keep the kids quite for a few minutes while on a road trip.

Monday, July 19, 2010

Spaghetti Sauce

This is how the onions should look just before you thrown in the garlic.


Just added the crushed tomatoes to the onion/garlic mixture. The tomatoes are bright red when they come out of the can.


Farm fresh basil!  Who's been eating my basil?


Just added the olive oil and basil.  Deep dark red and tasty.

Sauce that doesn't taste like candy, but tomato, garlic and basil.  This sauce has changed my spaghetti life.  I won't say never, but I don't plan on using premade spaghetti sauce anytime soon.

Simple Spaghetti Sauce
  • 2 T. butter
  • 1/2 onion, diced
  • 1/2 t. salt
  • 3 garlic cloves, minced
  • 1/2 t. oregano
  • 1 lg. can of crushed tomatoes
  • 1 t. sugar
  • 1 T. olive oil
  • 2 T. fresh basil, chopped
  • 1 lb. pasta

Dice onion and mince garlic. In a saucepan, melt butter and add onion, salt and oregano.  Saute for 5 minutes or until onions begin to brown and wilt.  Add garlic and cook for 30 seconds, until you can smell yummy garlic goodness.  Add crushed tomatoes and sugar.  Simmer until the sauce thickens and turns a deep red, about 10 minutes. Remove from heat and stir in olive oil and fresh basil.  Toss with your favorite pasta.

This post is linked up with Meatless Mondays.

This post is linked up with Tasty Tuesday.

Saturday, July 17, 2010

Refried Beans


So simple.  So good.  We love Mexican food at our house.  Burritos are my go to meal.  Burritos are even better with homemade refried beans.  I usually make a big pot of beans once a week, which will feed us for at least one dinner and one lunch.

Refried Beans
  • 5 cups dry pinto beans
  • 2 T. chicken bouillon powder
  • 2 T. chili powder
  • 1 t. garlic powder
  • 3 T. bacon grease


There are two methods to getting your beans started.  The first method for you all who think ahead would be to measure out your beans and soak them in your crock pot overnight.  The second method is to bring the beans to a boil (without spices) and once they are boiling, turn them off and cover the pan.  Let them sit for 1 hour. 

Once your beans are soaked, drain water and rinse beans.  Put beans and spices in crock pot. Fill with water to about 1 inch over the beans. Cook on low for 9 to 10 hours or on high for 5 to 6 hours.  Once your beans are soft, it is time to re-fry them.  Place 3 tablespoons bacon grease in cast iron frying pan and melt, then turn off heat (the beans are already really hot). Scoop about half the beans into the pan using a slotted spoon.  Begin mashing with a potato masher, adding the bean juice from the crock pot until you get the desired consistency.  I like mine kind of runny.  After they sit for a bit, they will start to drink up the bean juice and you may find you need to add more when you go back for seconds.  I store the rest of the whole beans in the fridge and re-fry them fresh (they taste best this way).


As for the chicken bouillon powder.....this is the secret weapon....


Friday, July 16, 2010

Sonlight Reveiw and Giveaway

Hi Friends!  The folks at Raising Olives are having a giveaway.  They have a review of Sonlight 6 and you can enter to win a $50 giftcard for Sonlight.  We will be using Sonlight 100 this year for our oldest chick.  I will have to get a post going on our choices for next year, but for now head over there and check out their site. 

Thursday, July 15, 2010

White Chicken Chili

It does seem like it may be a little hot for chili, but I was nice and cool this morning when I put it in the crock pot and nice and cool when I served it to the family with no effort in the kitchen.  The original recipe can be found in Family Feasts for $75 a Week. I served a green salad along side the chili with lots of fresh tomatoes. Yum!

White Chicken Chili
  • 1 T. olive oil
  • 2 chicken breasts, cut into bite size pieces
  • 1 onion, chopped
  • 6 cloves garlic, minced
  • 6 cups water
  • 4 cups chicken broth
  • 1 lb. dried Great Northern Beans, rinsed and picked over
  • 1 sm. can fire roasted diced green chilies
  • 1 T. chili powder
  • 1 t. ground cumin
  • 1 t. dried oregano
  • 1/4 t. cayenne pepper
  • Shredded cheese
  • Crushed corn chips or Cornbread

Heat oil in a cast iron skillet (or pan of your choice) and cook chicken, onion and garlic until onion is soft and chicken is cooked through, stirring frequently. Place chicken mixture in 4 to 5 quart crock pot. Add remaining ingredients except cheese and chips/cornbread. Turn crock pot to high for 30 minutes.  Depending on when you are starting your chili you could turn it to low and let it cook for 9 to 10 hours or keep it on high for 5 hours. (I promise the beans will be soft in just 5 hours on high without presoaking!  Just trust me on this.)  Ladle into bowls and top with cheese and crushed chips or just cheese and a side of cornbread. Serves 6.


Tuesday, July 13, 2010

Chinese Chicken Salad

Everyone has their own version of the Ramen Chinese Chicken Salad.  This is my version. 

2 bags of slaw, 2 bags of Oriental Flavor Ramen and 1 Armenian cucumber.


The chicken.


Crushed Ramen and slivered almonds.


Dressing:
  • 3/4 cup canola oil
  • 1/4 cup sesame oil
  • 6 T. sugar
  • 6 T. rice wine vinegar
  • 1 packet of Oriental Ramen seasoning
  • Salt and pepper to taste

Salad:
  • 2 bags coleslaw
  • 2 packages of Oriental Ramen
  • 2 chicken breasts, diced
  • 1 Armenian cucumber, diced
  • 1 cup slivered almonds
  • 1 bunch green onions, chopped, optional

Combine ingredients for dressing in a container with a tight fitting lid.  Shake well or mix well with a whisk.  Let sit at room temperature, shaking or stirring occasionally, until sugar is dissolved, about 1 hour.  Refrigerate until ready to use.  Crush Ramen.  In a large castiron skillet toast almonds and crushed Ramen until light golden brown. Dice chicken, cucumber and green onions.  Toss everything together with cabbage.  Toss with dressing and serve.

I often serve this as a side dish, omitting the chicken and call it Oriental Coleslaw or double it to serve a crowd!

This post is linked with Tasty Tuesday.

Monday, July 12, 2010

Big Yellow Zebra Tomatoes


This is the first heirloom tomato picked this year.  It is a Big Yellow Zebra Tomato.  This is my first time trying this variety.  The tomato plants are large and so are the tomatoes.  It looks like they are going to be good producers.  There are lots of green tomatoes out there!


Sliced up for lunch.


Peppered turkey with Swiss Laughing Cow, red onion and Big Yellow Zebra tomato on fresh bread.  Yum!

Whole Wheat Bread


This is my yeast proofing.  It is nice and foamy.  I always proof my yeast.  It is easier to start your bread again during the first step than after you wait for the first rise and nothing happens.  If your liquid is too hot (140 degrees or more) you will kill your yeast.  The perfect temperature to activate your yeast is between 80 and 90 degrees.


A nice and neat ball. Cover and let rise 30 minutes or until doubled.


Here it is a little more than doubled after just 30 minutes.  It is hot here in this part of the world.


On the left the dough has been punched down and shaped into a loaf, then placed in a greased loaf pan.  After 35 minutes my bread was ready for the oven.


Whole Wheat Bread


  • 1-1/2 cups warm water

  • 1/4 cup demerara or honey

  • 1 T. yeast

  • 4 cups whole wheat flour

  • 3 T. gluten

  • 1 t. salt
Pour warm water in the bowl of your mixer and add sugar or honey.  Stir until dissolved.  Add yeast and let proof for 5 to 10 minutes, until foamy and as my brood would say "Smells like beer."  Once yeast is proofed, add flour, gluten and salt. Knead in your mixer for 5 minutes. Form into a ball and place back in mixing bowl. Cover and let rise 30 minutes or until doubled. Once doubled, punch down and form into a loaf.  Place in loaf pan prepared with nonstick spray. Cover and let rise for 30 minutes more or until doubled. Preheat oven to 350 degrees. Bake for 35 minutes. Remove from oven. Let sit in pan for 10 minutes, then remove to a wire rack to cool.  It is easiest to cut bread once it has cooled completely.  It will tear really easy if it is cut hot.  For the best cutting success a sharp knife is key.

Sunday, July 11, 2010

Homemade Chicken Feeder


Rowdy made this chicken feeder.  
 

Getting ready to go nighty-night.

Peaking out of the roosting box. 


How to make a chicken feeder:
  1. Gather your supplies.  You will need a plastic flower pot, size depending on how many chickens you are feeding.  You will need a plastic saucer that is at least 2 inches in diameter bigger than the bottom of your pot.  Any wire or coathangers you have lying around and 1 eye bolt.  You will also need a handful of screws, utility knife and a drill.
  2. Carefully carve out some holes on the sides of the pot, at the bottom, about 2 inches square.  Poke three equally spaced holes at the top of the pot for your hanging wire.
  3. Turn pot upside down and place saucer on the bottom.  Screw the saucer to the bottom of the pot with the screws going up through the pot. You don't want to let your chickens get scratched up.
  4. Cut three equal lenghts of wire, measuring from the roof of your coop to the heighth you want it from the ground, adding a couple of inches for twisting the wire.  Put a piece of wire through each hole and twist it a good many times so that it will holdup with the weight of the food.  Pull the wire up together at the top, like a tepee and secure to the top of the coop. We used an eye bolt, screwed into a rafter. 
  5. Rowdy suggests hanging the feeder chest high to a chicken.
  6. Fill with food!
That's it folks.  We also feed our chickens scraps. Raw fruits and veggies, like lettuce leaves, watermelon rinds, tomatoes that have been poked by birds (dumb birds!), whatever we might not want to eat.

Friday, July 9, 2010

BBQ Pizza


Here is the grill.  Notice the charcoal is set up for indirect cooking.  The hot coals are only around the edge of the BBQ and none directly under the pizza.

Prosciutto, pepperoni and red onion.

Cheese!  Look at those yummy bubbles.

Tomato and basil...fresh from the garden.

Tonight we had BBQ pizza.  BBQ pizza is pretty simple.  You can find my crust recipe here.  Once you have your dough rising, you should get your charcoal going.  We use a chimney and it takes about 40 minutes for the coals to get hot. Meanwhile, divide the dough into three pieces and place each on a piece of parchment paper big enough to accommodate the pizza.  You will need assemble the pizza on something sturdy so that you can carry it to the BBQ and remove it from the BBQ.  I was making three pizzas, so I used one pizza peel and 2 round pizza pans.  Pat each piece of dough into about a 14 inch circle.  This made a thin, crispy crust. Today we had red sauce on our pizza.  You can use any jarred sauce.  I just use a small can of tomato sauce and then season with garlic salt, oregano, basil, whatever smells good. Put your toppings on your pizza.  Of course I used Jack cheese.  This makes good pizza people!  Top as you please.  Once the grill is ready slide the pizza carefully to the center of the grill keeping it on the parchment paper.  The pizza will take 6 to 10 minutes, depending on how hot the grill is.  Since it was about 100 degrees outside when we were cooking the pizza, our pizza only took 6 minutes.  You can check the bottom of your crust by lifting up the side with a spatula.  Removing the pizza can be tricky.  A pizza peel is your best bet, since you can just slide it quickly under the pizza to remove.  You can also carefully remove it using a spatula, holding your pan close to the grill, carefully lift pizza on to the pan.  Give it a try, you won't be sorry.

This post is linked to Works For Me Wednesday.

Thursday, July 8, 2010

More Skirts!


Finished the last skirt.  Now to see if I can get pictures of all the chicks together.  You know that the more kids you have the harder it is to get a good picture. 

Baby Chick's Skirt


My little baby chick is very hard to take a picture of.  She moves at the speed of light!  I finished her skirt today.  It turned out really cute and she can spin like crazy in it.  I used the Emerson skirt pattern.  It is a really fast skirt to make.  Even a beginning seamstress could whip this skirt up in a couple of hours.  I am off to finish the first born chick's skirt. 

Wednesday, July 7, 2010

Pepperoni Rolls


Yummy!!!

This is the crispy cheesy bottom. (The best part.)

These are delicious.  They are great served along side pasta or salad.  You can serve them with marinara for dipping or just eat them as the are.  We had these last night with pasta and corn on the cob. 

Pepperoni Rolls

  • 1 cup warm water
  • 1 T. yeast
  • 2 t. sugar
  • 1 t. oregano
  • 1 t. basil
  • 1 t. salt
  • 3 cups flour
  • 1-1/2 cups jack cheese, grated
  • 1 cup pepperoni, diced
  • Marinara sauce, optional

In the bowl of your stand mixer combine water, sugar and yeast. Let proof for 5 minutes.  Add flour, salt, oregano and basil.  With the dough hook combine and knead for 5 minutes.  Once your dough has finished kneading, shape into a ball, place in an oiled bowl, cover and let rise for 1 hour.  Punch down dough and pat out into a rectangle about 17x12 inches.  (I use my cookie sheet as a guide and pat out my dough in my cookie sheet, just like pizza and cinnamon rolls.)  Sprinkle with cheese and pepperoni.  Roll up starting on the longer side and pinch seam together.  You will now have a roll about 17 inches long.  Slice into 16 pieces.  Spray a 15x10 inch Pyrex with nonstick spray and place rolls in pan.  Cover and let rise 30 to 45 minutes, until just about doubled.  Preheat oven to 350 degrees and bake for 25 to 30 minutes.

Today's post is linked up with WFMW.

LinkWithin

Related Posts Plugin for WordPress, Blogger...