Saturday, August 28, 2010

Roasted Potatoes....Perfect with Burgers!


Potatoes are a must side dish with hamburgers.  Frozen french fries just don't cut it.  This is a quick method for roasting potatoes. 

Quick Roasted Potatoes
  • 5 lbs. of potatoes, russets work, but red are better
  • 1/2 of an onion, yellow or red
  • Olive oil
  • Salt and pepper to taste

Preheat oven to 425 degrees. Peel (if using russet, not for red) potatoes and cut into bite size pieces, not too small. Chop onion. Toss potatoes and onion in a microwave safe bowl with olive oil and salt and pepper. Cover with plastic wrap, leaving a little section open for steam to escape, and microwave for 10 minutes on high. Remove from microwave and spread on a cookie sheet sprayed with nonstick spray. Place in preheated oven and cook for 20 minutes longer.  To get a nice crispy top, place the, potatoes under the broiler for 7 to 10 minutes, watching carefully.  These are also yummy with garlic or bell peppers tossed in.

Making Your Own Ground Beef

Our beef source has been out of ground beef for quite sometime now.  We just can't eat ground beef from the grocery store after watching the movie Food Inc.  Hamburger rinsed in ammonia just doesn't sound that great.  We love hamburgers around here and have been missing them in our weekly rotation...especially during the summer.  What is a summer without burgers?  We got a wild hair to grind our own beef!  A trip to Kohl's for the Kitchen Aid grinder attachment and a trip to Von's for some beef....and we were in business.  I had done some research on the Internet as to what cuts of meat to get, it really comes down to personal preference.  I will be watching the sales closely to stock up on some beef.

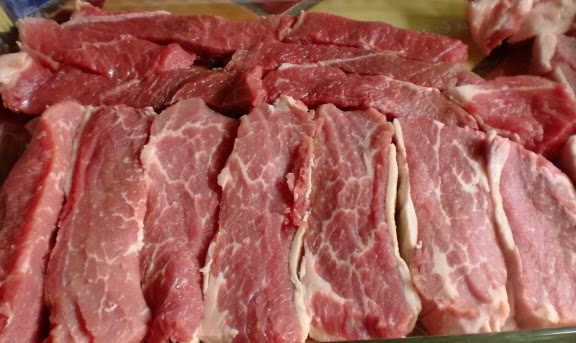
This is 1-1/2 pounds of thin beef chuck shoulder sliced into 1 inch wide strips.

This is 1-1/2 pounds of tri-tip sliced into strips about 1 inch wide.  I did trim the fat down quite a bit, but you want to leave some for juicy burgers. 


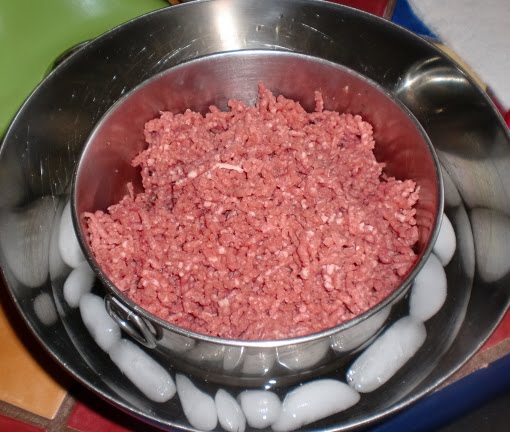
The set-up.  One bowl placed in another bowl with ice will keep the meat very cold and help prevent the growth of any bacteria.


Let the grinding begin.

This is after the first grind.  The grinder comes with two plates, one coarse and one fine.  First grind through the coarser plate, then grind again through the finer plate.


Ready to go.

This is a 3 inch biscuit cutter.  Loosely pack your ground beef in ring for the perfect size burger.  Once you pop it out of the ring, gently press it to desired thickness.

It won't be good unless you fry it in a cast iron pan.  Okay, it might be good, just not as good!


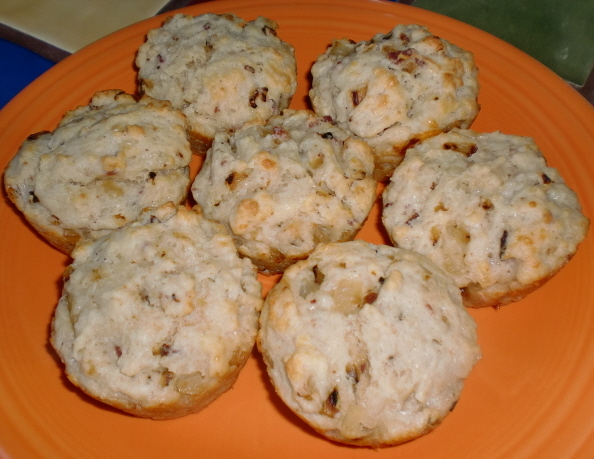
Here it is in all its glory!  When the burger was first "invented" it was served on toasted white bread.  This is not toasted, but it was fresh baked and hot from the oven. 

Ground Beef
  • 1-1/2 lbs. thin sliced chuck shoulder
  • 1-1/2 lbs. tri-tip
Slice beef into 1 inch thick strips. Once all the meat is sliced, place in a single layer on a cookie sheet or a pan that will fit in the freezer and freeze for 30 minutes.  Also, place the parts of your grinder in the freezer. You will want to work quickly to keep the meat as cold as possible to prevent bacteria growth.  Have a bowl ready to catch the meat, placed in a bowl of ice.  If you like your burgers rare and mooin' grinding meat is for you.  Push meat through grinder with coarse disc, then again with the fine disc.  Make your patties immediately or place in back of fridge to keep very cold for later use.  You can also freeze your fresh ground beef in desired amounts to cut down on how much time you spend grinding.

To cook the perfect burger, measure out burger into 3 inch biscuit cutter, loosely packing. Pop out of the biscuit cutter and flatten to desired thickness.  Sprinkle both sides with salt and lots of fresh ground black pepper.  Fry in a hot, seasoned, cast iron skillet for best results.


Wednesday, August 25, 2010

Squirrel Trapping....Spirit of the Wild

Chicken, Zucchini and Cream....Yum!


Roughly chop one large onion. Saute in 2 tablespoons olive oil until they start to wilt.


Chop up some squash.  I used 3 zucchini and 1 yellow squash.  Add to onion, once the onion is wilted. Saute until desired consistency. 


Yummy goodness.


Two cups of cooked chicken breast. You could use leftover chicken or rotisserie chicken.


Get the water boiling and time it so pasta and zucchini will be done at the same time.  I used no yolks to offset the 2 cups of cream

.

Chicken, Zucchini and Cream
  • 1 onion, roughly chopped
  • 4 zucchini or whatever you have in your garden or fridge, chopped
  • 2 T. olive oil
  • 2 c. cooked and diced chicken
  • 2 c. cream
  • 1/2 c. Parmesan cheese, plus more for sprinkling
  • Salt and pepper to taste
  • 2 bags of No Yolks or pasta of your choice

Heat oil in large frying pan, cast iron works well. Saute onion until it wilts. Add zucchini and salt and pepper to taste. Cook to desired consistency.  We like ours soft, but not mushy.  Meanwhile get water boiling for pasta. Once you have zucchini to desired consistency, add cream and simmer until cream thickens, about 10 minutes. Toss in chicken to heat.  Taste for salt and pepper.  Drain pasta and toss with zucchini/chicken mixture and 1/2 cup Parmesan cheese.  Serve with more Parmesan for sprinkling.  Serves 6 to 8.

This post is linked up with Raising Homemakers.

Wednesday, August 18, 2010

Corn Dog Mini-Muffins


The batter.  It may seem runny...but that is how it is supposed to be.


Cut each hot dog into 6 slices.


Fill each mini-muffin cup about 3/4 full of batter and then place a slice of hot dog in the middle.


I found this recipe at Lynn's Kitchen Adventures about a year ago.  My kids love it!  The kids love corn dogs, but we try to stay away from premade stuff.  I have cut back the sugar from the original recipe and they are still plenty sweet.  I have also made these with whole wheat flour and no one knew the difference.

Corn Dog Mini Muffins
  • 1 cup all-purpose flour
  • 1 cup yellow cornmeal
  • 1/2 cup white sugar
  • 1 t. salt
  • 3 1/2 t. baking powder
  • 1 egg
  • 1 cup milk
  • 1/3 cup vegetable oil
  • 6 hot dogs
Preheat oven to 400 degrees.  Prepare mini-muffing pans by spraying with nonstick spray. (This recipe makes approximately 36 mini corn dogs.) Mix together dry ingredients. Then add the liquid ingredients. Stir until mixed thoroughly.  Scoop into a greased mini muffin pan, filling the cups about 3/4’s of the way full. Cut each hot dog into six pieces. Put one piece in each muffin cup. Bake 10 minutes or until golden brown.

Bacon, Cheese and Onion Biscuits


Last night breakfast was on the dinner menu.  The chickens have been out of control lately.  The kids had collected 24 eggs since Saturday!  Each chicken laid an egg a day for the past four days.  This means the egg basket was rapidly getting to the point of over flowing.  I wanted a different biscuit, not the usual biscuit so I googled three ingredients...bacon, cheese and onion.  The first recipe that came up was from the Pioneer Woman's site.  I knew it was meant to be. These would also be tasty served along side soup.


Bacon, Cheese and Onion Biscuits
  • 2 cups All-purpose Flour
  • 1 teaspoon Baking Powder
  • ¾ teaspoons Salt
  • ¼ cups Vegetable Shortening (Crisco, Etc)
  • 10 Tablespoons Milk (whole Milk Is Best)
  • 4 Tablespoons Vegetable Oil
  • 1 whole Egg
  • 5 slices bacon, fried crisp and crumbled
  • 1 cup Finely Diced Onion
  • 1 cup shredded cheese (I used jack, but suppose that Sharp Cheddar Cheese would be super tasty)
Fry bacon until crisp. Drain on paper towel. Pour out all but about 1 tablespoon bacon grease (reserve in fridge for refried beans!). Saute onion until golden and soft. Set aside to cool. Crumble bacon.  Sift together flour, baking powder, and salt. Using a pastry cutter, cut in shortening until all combined. Combine milk, oil, and egg in a separate bowl. Whisk together.  Combine flour mixture, milk mixture, bacon, onions, and cheese in a large bowl. Stir gently until all combined.  Spoon batter into greased muffin tins. Bake for 20 to 22 minutes on 375 degrees until golden. Serve warm.

Tuesday, August 17, 2010

Multi-Grain Cinnamon (Raisin) Bagels


I posted here that I am on a bagel kick.  Trying to make mornings easier once we get going on school, which should be the second week of September. We are going camping with my sister and her family this coming weekend and then the week of Labor Day we will be heading to the Sierras for some fun.  The joys of home schooling, vacationing when you want to, and when no one else is.  Also, we wouldn't want to socialize our kids ;O).

My post on egg bagels has some more detalied pictures of the process of making bagels. 

Multi-Grain Cinnamon (Raisin) Bagels
  • 1-1/2 c. water
  • 1 T. yeast
  • 3 T. brown sugar, packed
  • 2/3 c. quick cook oatmeal
  • 2 c. white flour
  • 1 c. wheat flour
  • 1 T. gluten (optional, but will make a fluffier bagel)
  • 2 t. salt
  • 2 t. cinnamon
  • 2 T. vegetable oil
  • 3/4 c. raisins (I was out of raisins!)
  • 2 t. cinnamon
  • 3 T. sugar for boiling water


In the bowl of a stand mixer combine warm water and sugar. Sprinkle yeast over water and let proof for 5 minutes. Once yeast is proofed, add oatmeal and let stand another 5 minutes.  Add the rest of the ingredients and knead with dough hook for 5 minutes. Once dough is kneaded, shape into a ball and place in an oiled bowl. Cover and let rise until doubled, 45 minutes to 1 hour. Once the dough has doubled, punch down and divide into eight pieces. Shape each piece into a smooth ball, pulling the dough down and under (does that make sense?). Let dough balls rest 5 minutes. Spray a cookie sheet with nonstick spray. To shape your bagels, poke your thumb threw the middle of the dough ball and stretch the bagel out from the center forming a bagel shape. Place bagels on cookie sheet. Cover and let rise until just about doubled, probably 30 to 45 minutes. Bring a large pot of water to a boil and add 3 tablespoons sugar. Once water is boiling, gently pick up bagel from greased cookie sheet, trying not to deflate the bagel, and slide carefully into boiling water. Boil 1 minute, flip, boil 1 minute more. Remove from boiling water to cookie rack (with a towel underneath) and and let drain. Preheat oven to 400 degrees. Once all bagels have been boiled, return them to the greased cookie sheet. Bake in preheated oven for 20 to 25 minutes, until golden brown. The bagel dough can also be made in your bread machine, following directions for dough cycle.

This post is linked up with Tasty Tuesday.


Saturday, August 14, 2010

Egg Bagels


Divide dough into 8 equal pieces and shape into balls. Let rest 5 minutes.


Poke a hole in the center of dough ball and stretch out from the center making a bagel shape.


Boil bagels for 1 minute on each side.


Boiled bagels ready for the oven.


Bagels are easy to make and of course cheap to make.  I have been trying different recipes lately.  I want to make and freeze bagels for the school week to cut down on DISHES and WORK in the morning.  Does anyone else out there run their dishwasher more than once a day? 

Egg Bagels
  • 1 cup warm water
  • 1-1/2 T. sugar
  • 2 t. yeast
  • 3-1/3 cups flour
  • 1 large egg
  • 2 T. oil
  • 2 t. salt
  • 3 T. sugar for boiling water

In the bowl of a stand mixer combine warm water and sugar. Sprinkle yeast over water and let proof for 5 minutes. Once yeast is proofed, add flour, egg, oil and salt.  Knead with dough hook for 5 minutes.  Once dough is kneaded, shape into a ball and place in an oiled bowl. Cover and let rise until doubled, 45 minutes to 1 hour.  Once the dough has doubled, punch down and divide into eight pieces. Shape each piece into a smooth ball, pulling the dough down and under (does that make sense?). Let dough balls rest 5 minutes. Spray a cookie sheet with nonstick spray. To shape your bagels, poke your thumb threw the middle of the dough ball and stretch the bagel out from the center forming a bagel shape.  Place bagels on cookie sheet. Cover and let rise until just about doubled, probably 30 to 45 minutes.  Bring a large pot of water to a boil and add 3 tablespoons sugar. Once water is boiling, gently pick up bagel from greased cookie sheet, trying not to deflate the bagel, and slide carefully into boiling water. Boil 1 minute, flip, boil 1 minute more.  Remove from boiling water to cookie rack (with a towel underneath) and and let drain.  Preheat oven to 400 degrees.  Once all bagels have been boiled, return them to the greased cookie sheet. Bake in preheated oven for 20 to 25 minutes, until golden brown.

This post is linked up with Meatless Monday.

Wednesday, August 11, 2010

Honey Wheat Clover Rolls


The dough.


Divide into 12 equal pieces.  I make a circle, cut in half, cut the halves in half and then cut each wedge into three more pieces....poof....12 pieces.


Now tear each wedge into three pieces and roll into balls.


Spray muffin pan with nonstick spray and place three balls in each muffin cup.


Hot out of the oven.  Please excuse the pan.


Honey Wheat Clover Rolls
  • 1 c. warm water
  • 2 t. yeast
  • 1/4 c. honey
  • 2 c. bread or all-purpose flour
  • 1-1/4 c. whole wheat flour
  • 1 egg
  • 1 t. salt
In the bowl of your mixer combine water and honey. Sprinkle yeast on top and let stand for 5 minutes to proof.  Add flours, salt and egg.  With dough hook, knead for 5 minutes.  Shape into a ball, place back in mixer bowl, cover and let rise for 45 minutes or until double.  Remove dough and punch down. Reshape into a ball.  Cut into 12 equal pieces.  Now divide each piece into three smaller pieces, rolling into balls.  Prepare muffing pan by spraying with nonstick spray.  Place three balls in each muffin cup. Cover and let rise for 30 minutes or until doubled.  Preheat oven to 350 degrees. Bake for 20 to 25, until golden.  You could also make the dough in a bread maker on the dough setting.

Tuesday, August 10, 2010

Preparation for 8th Grade


This past weekend we  attended the Valley Home Educators home school conference.  We are going on our 9th year home schooling and we have never been to a convention.  We enjoyed Voddie Baucham.  I was glad I was armed with my list of what I wanted to get.  It would be really easy to get overwhelmed by all those books.  I try not to get overwhelmed by looking at the list below, but I know that my #1 chick is up to the task.  I think the biggest challenge to schooling this year will be baby chick, who is 20 months old. 


Here is what 8th grade will look like at our house:

  • Sonlight Core 100
  • Math U See Geometry
  • Apologia Physical Science
  • Institute For Excellence in Writing Level B (This will be our first year using this and will be doing it with two of the kiddos)
  • Piano and Trombone lessons

Sunday, August 8, 2010

Ice Cream Cake


Today we celebrated Rowdy Jr's 7th birthday.  He requested ice cream cake.  Chocolate cake with cookies and cream ice cream to be exact.


Yummy!


Ice Cream Cake
  • 1 cake mix
  • 1 can frosting
  • 1 tub ice cream
Set ice cream out on the counter for a few minutes.  Get one of your cake pans ready for ice cream.  Line the cake pan with Saran Wrap. Scoop in softened ice cream to the top.  Let set on the counter a few more minutes and smooth out when soft enough.  Place in freezer, in pan, until hardened.  Once hardened, lift out of pan and place back in freezer.  Prepare cake as directed in two pans, the same size as the one you used for your ice cream layer.  Cool cake completely. To assemble: place first cake on cake plate and slice off the top to make it nice and flat. Unwrap ice cream layer and place on top of cake. Top with the second cake layer. Place back in freezer for 30 minutes. (The ice cream softens quickly!) Remove from freezer and frost with your favorite frosting. Place back in freezer until ready to serve.


Saturday, August 7, 2010

Three Cheese Skillet Lasagna


Here is my one pot lasagna just out of the oven.  This was really simple to make and quite tasty. I have a few cooking shows that I love.  Everyday Food is one of them.  The recipes are fairly simple and always tasty.  This one pot lasagna is made in an oven-proof skillet.  You make the sauce in the same pan that you  assemble the lasagna in.  I love to use my green pot!  I am addicted to enameled cast iron.


Sauce simmering on stove.


I put the chive bread in the oven to bake while I prepared the lasagna. 


Ricotta, egg yolk, salt and pepper.


No boiling!


First layer.


Ready for the oven, but first I must pull the chive bread out.....


Three Cheese Skillet Lasagna
  • 43 ounces canned whole peeled plum tomatoes (from a 28-ounce can and a 15-ounce can
  • 4 garlic cloves, finely chopped
  • 3 tablespoons extra-virgin olive oil
  • Coarse salt and ground pepper
  • 1 large egg yolk
  • 1 1/2 cups part-skim ricotta cheese, room temperature
  • 1 box (12 ounces) no-boil lasagna noodles
  • 1/2 pound fresh mozzarella, shredded
  • 1/4 cup grated pecorino or parmesan cheese

Preheat oven to 400 degrees. Put tomatoes in blender until pureed. In a large deep skillet, bring tomatoes, garlic, and oil to a boil. Season with salt and pepper. Reduce to a simmer and cook on medium until thickened, about 12 minutes (you should have 5 cups marinara sauce). Meanwhile, in a medium bowl, mix together egg yolk, ricotta, and 1/2 teaspoon each salt and pepper.  Carefully pour sauce into a heatproof bowl and return 3/4 cup to skillet; spread sauce evenly. Add a single layer of noodles, breaking them up to fit. Top with half the ricotta mixture, spreading evenly, sprinkle with parmesan and 1/3 of the motzarella. Follow with a second layer of noodles, then 1-1/2  cups marinara. Add a third layer of noodles, then remaining ricotta mixture, sprinkle of parmesan and 1/3 of the mozarella. Follow with a final noodle layer, then remaining sauce. Sprinkle mozzarella and parmesan over top. Bake lasagna until golden and bubbling, 30 to 35 minutes. Let stand 10 minutes before serving. Serves 4.  There are six of us, one who hates pasta, one who is 1, and we ate every bit.

This post is linked up with Meatless Monday.

This post is linked up with Tasty Tuesday.

LinkWithin

Related Posts Plugin for WordPress, Blogger...